
DIY Laundry Room Makeover on a $0 Budget: Easy DIY Wallpaper Wall
Skip pricey wallpaper — learn how to sponge-stamp a budget-friendly accent wall using paint you already own. A full step-by-step DIY tutorial for beginners.
HOME DIY & DECOR
7/18/20264 min read
Laundry Room Makeover Before and After: DIY Painted Wallpaper Wall
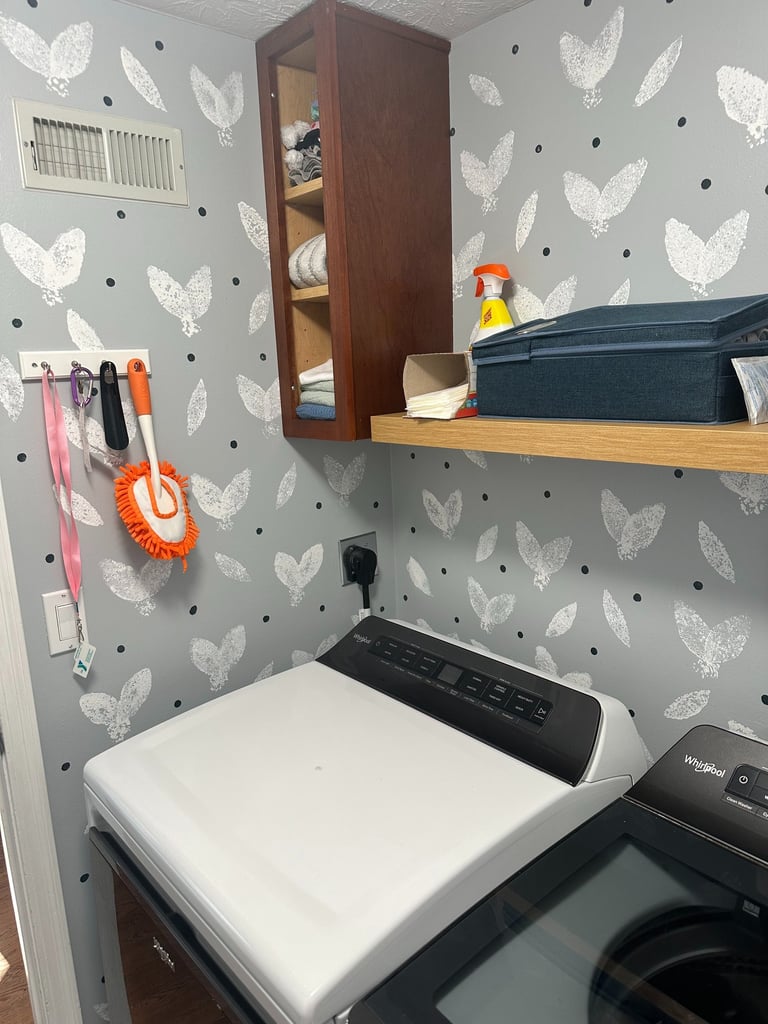
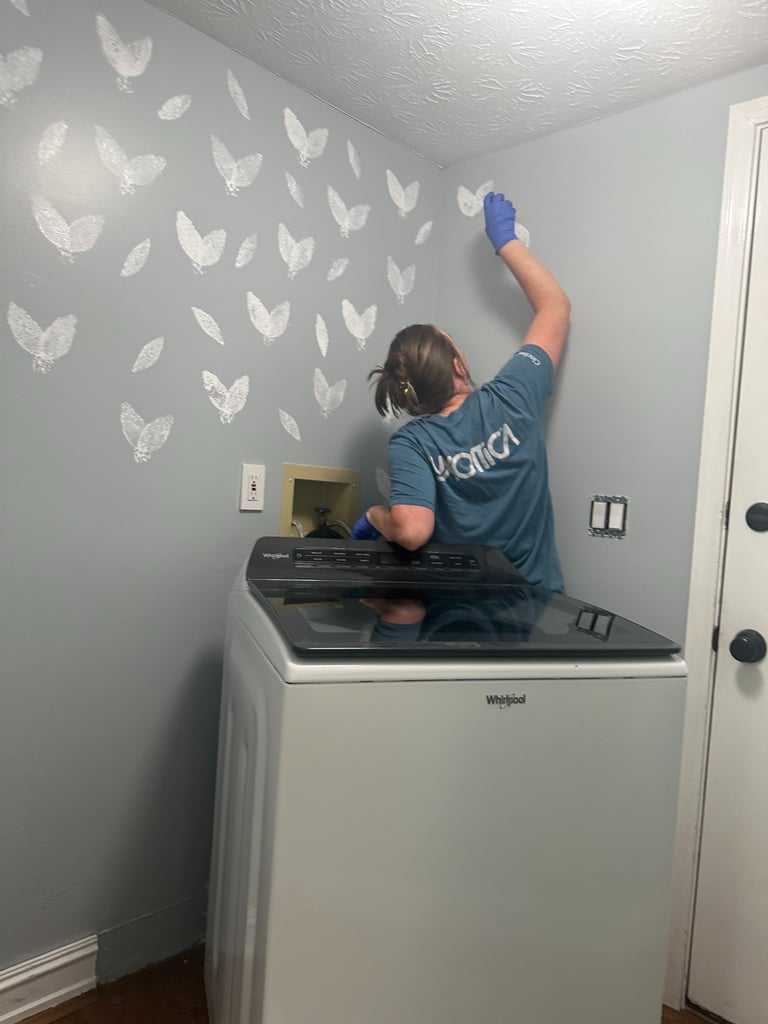
Our laundry room went from plain and unfinished to a space that feels a lot more intentional, and the best part is that this DIY laundry room makeover cost me $0. I used leftover paint, a sponge, and the kids paint brushes I already had on hand to create a painted wallpaper look that gave the room a soft, handmade pattern without buying expensive wallpaper.
If you’ve been looking for a budget-friendly way to update a laundry room, this is a great project to try. It’s simple, customizable, and a fun way to bring a little personality into one of the hardest-working rooms in the house.
Why Sponge-Stamping Beats Real Wallpaper
It's free (or close to it). No rolls, no paste, no steamer to remove it later.
It's forgiving. Uneven walls, textured ceilings, weird corners — none of it matters because you're not trying to line up seams.
It's totally customizable. Change the stamp shape, the paint color, the spacing — it's basically a paint-by-mood project.
It removes easily. Since it's just paint, a coat of primer and you're back to a blank wall whenever you're ready for a change.
What You'll Need
Here's the beauty of this project — you probably already own most of this.
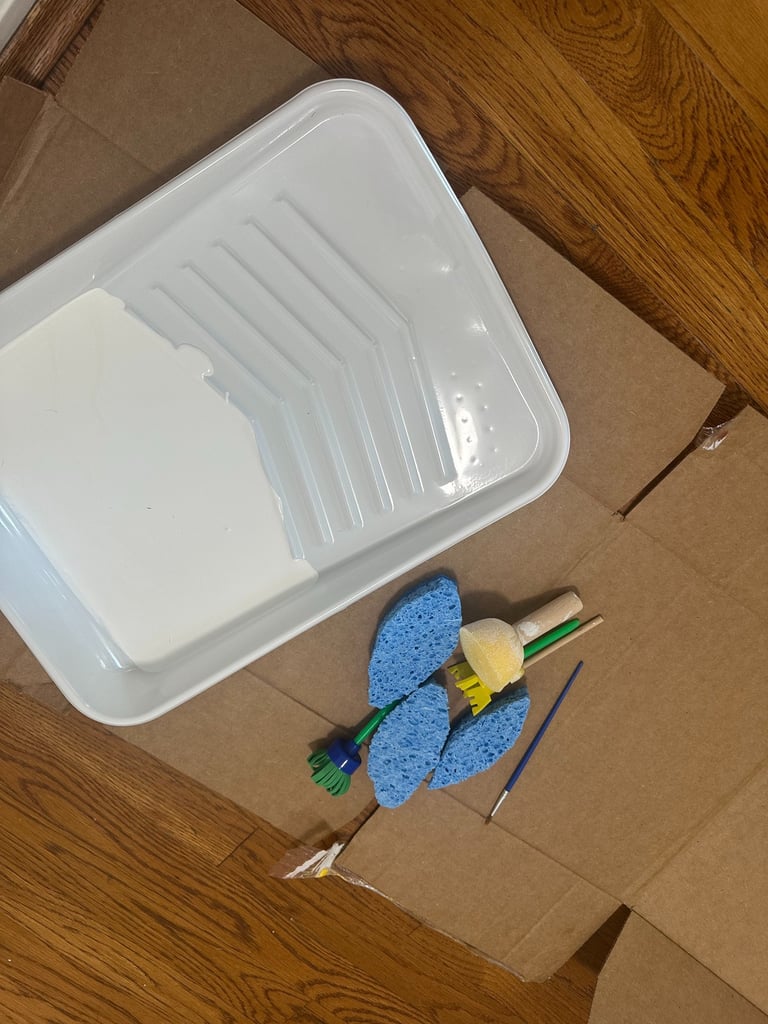
Leftover wall paint in a lighter/contrast color (I used white on top of gray)
A shallow paint tray or lid (literally any flat container works)
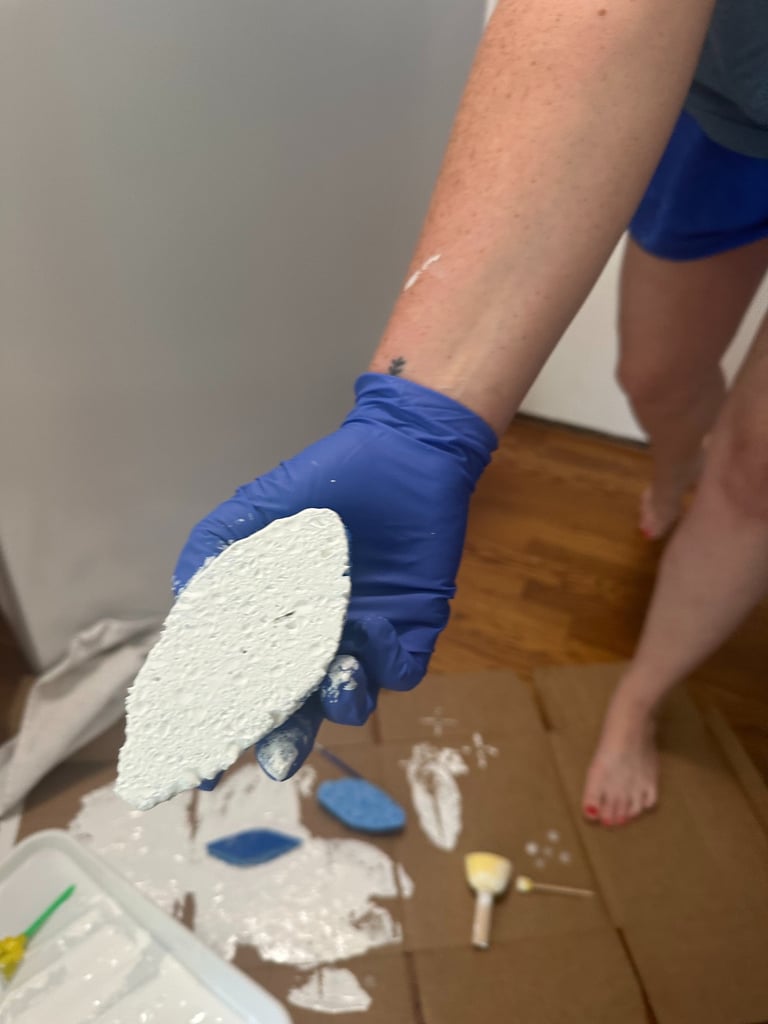
A few kitchen sponges cut into the shape of your choice
A small round or fine detail brush (for the little accent dots)
Cardboard (broken down diaper box is what I used)
Step-by-Step: How to Sponge-Stamp a Wall
1. Start with a clean, dry base coat. My walls were due for a fresh paint job, so I painted my base coat first and let it dry overnight before stamping.
2. Pour a thin layer of paint into your tray. You want just enough to coat the sponge — too much paint and your stamped shape turns into a blob instead of a crisp print.
3. Dab, don't press. Load the sponge lightly, then dab off the excess on a scrap piece of cardboard before it touches the wall. Your first stamp on cardboard is basically a "test print" — always do this first.
4. Stamp in a loose, scattered pattern. Skip the grid. Real wallpaper patterns aren't perfectly even, and neither should yours be. I worked in small clusters, varying the angle of the stamp so no two "butterflies" faced the exact same direction. Step back every few stamps to check the spacing from a distance — it looks different up close than it does across the room.
5. Reload often. Every 2–3 stamps, re-dip and dab off again. This keeps your print texture consistent instead of fading out mid-wall.
6. Add the detail dots last. Once your main pattern is done and dry, use a small brush to dot in little accent marks between the shapes. This is what makes it read as an intentional pattern instead of "mom got a stamp and went wild" (even though, let's be honest, that's exactly what happened).
7. Let it fully dry, then admire your free wallpaper. No steaming, no seams, no regret.
Tips for a Cleaner Pattern
Work top to bottom so you're not resting your arm on wet paint.
Keep a damp rag nearby for stray drips — sponge painting is a little messy by nature.
If a stamp comes out too heavy or blobby, wipe it off immediately with a damp cloth and try again. Wet paint forgives.
Don't overthink the spacing. Uneven and organic is the whole point.
The Storage Glow-Up: Free Floating Shelf + Cabinet
The wall was only half the makeover. The other half? Storage.
My parents' neighbors were getting rid of some old kitchen cabinets a while back, and my dad — knowing they'd come in handy one day — grabbed the ones worth salvaging and brought them to me. I still have quite a few left, but I found the perfect one to elevate the laundry room organization, without spending a dime. We also had an old, unopened floating shelf we never knew what to do with. Together, they became the upgrade this tiny space needed.
Here's how I made hand-me-down pieces look intentional:
Paint or clean them to match your palette first. The cabinet still had its original wood finish, and rather than fighting it, I let it stay as a warm wood contrast against the gray walls.
Mount at a useful height, not just an even one. I placed the shelf low enough to actually reach for stain treaters and dryer sheets.
Use what's inside to add texture. Rolled towels, a fabric bin, and a small tray on the shelf do double duty as storage and styling — no need to buy matching baskets when what you have works.
Don't skip the stud finder. Free furniture is still furniture — anchor into studs (or use proper wall anchors) so it holds real weight safely.
This entire laundry room refresh cost exactly $0 — and it's proof that a "makeover" doesn't have anything to do with what you spend.
Where This Works Best
This technique is perfect for small, low-traffic spaces where you want big visual impact without a big commitment — laundry rooms, closets, powder rooms, or a single accent wall in a nursery. It's also a great weekend project if you're easing into DIY and want something with a huge "wow, you did that yourself?" payoff for very little effort.
If you liked this, you'll probably also love my DIY wall stenciling bathroom makeover — same $0 mentality, different pattern.
Related Posts
STAY CONNECTED
GET IN TOUCH
Questions or ideas?
AngelaMarie@mommakeshome.com
© 2026. All rights reserved