How to Patch Drywall Holes and Chips
That chip on your wall you keep staring at from the couch? Here's exactly how to fix it in 20 minutes with three supplies — a beginner's complete guide to patching drywall holes and chips.
HOME DIY & DECOR
6/6/20266 min read
That Spot on the Wall You Cannot Stop Looking At
You know the one.
The chip on the corner of the archway. The nail hole from the picture you moved six months ago and never filled. The little ding near the baseboard that you notice every single time you walk past it and then immediately forget about because someone needs a snack or a sibling just did something to another sibling and suddenly the wall is the last thing on your mind.
That was me for months.
We have an archway leading into our living room that had chips on the corners — the kind that happen when you have three kids under six, furniture that occasionally gets moved, and a two-year-old son who is absolutely obsessed with his ride-along car and whips it around the house with zero regard for the walls. I would sit on the couch and stare directly at those chips. Every single day. The itch to fix it just kept getting stronger — especially after I painted our half bath and suddenly my eye for imperfection was fully activated.
But I kept getting distracted by mom duties. That is just the reality of trying to tackle anything in a house with young kids. You see the problem, you mentally commit to fixing it, and then someone needs something and by the time you resurface the thought is completely gone.
Until one day I just did it…and you can too. It is not as complicated as it may seem. I promise.
Quick Reference — The Full Process at a Glance
Heads up — some links in this post are affiliate links, meaning I earn a small commission at no extra cost to you. Thank you for the support!
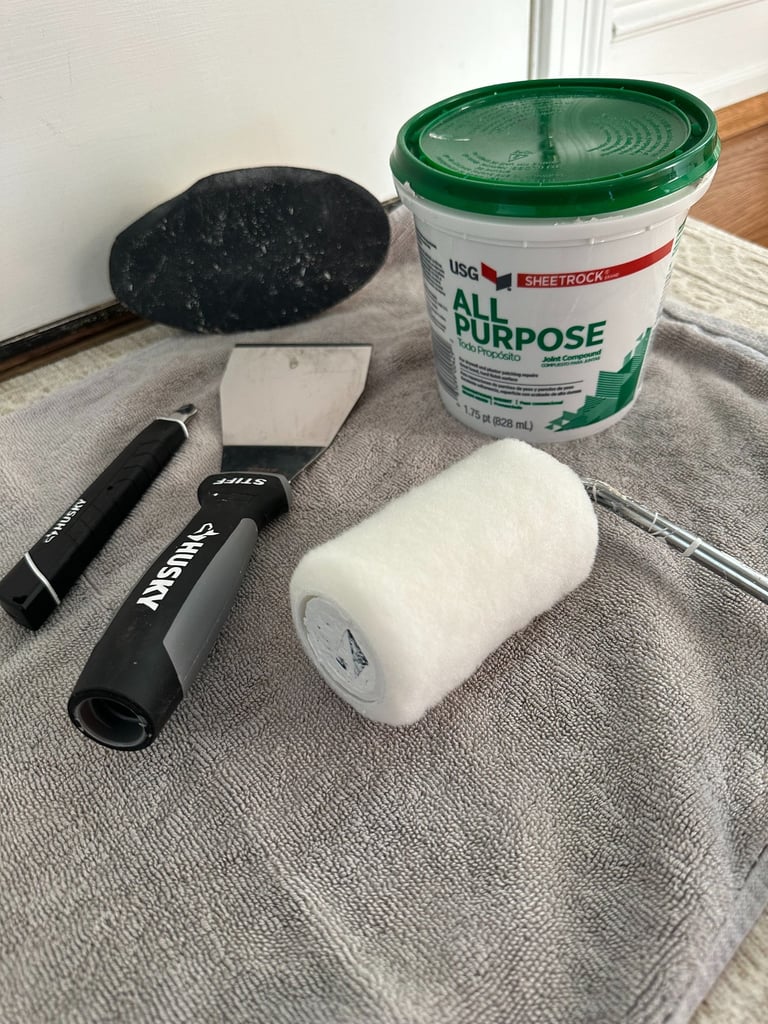
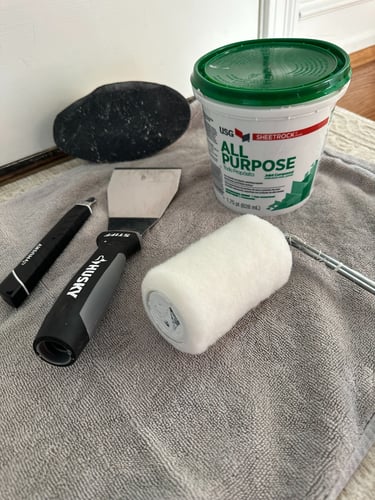
Supplies List — Everything You Need
Matching wall paint (use your leftover paint)
Total cost if you need to buy everything: Under $20. Realistically closer to $10 if you already have paint and a brush.
The Step by Step Process
Step 1 — Clean the Area
Before you apply anything make sure the damaged area is clean and dry. Dust, loose paint chips, and debris will prevent the putty from adhering properly. Use your finger or a dry cloth to brush away any loose material around the chip or hole. If there are any sharp edges of drywall paper sticking up, press them down or carefully trim them away.
This takes about thirty seconds and makes a real difference in your finished result.
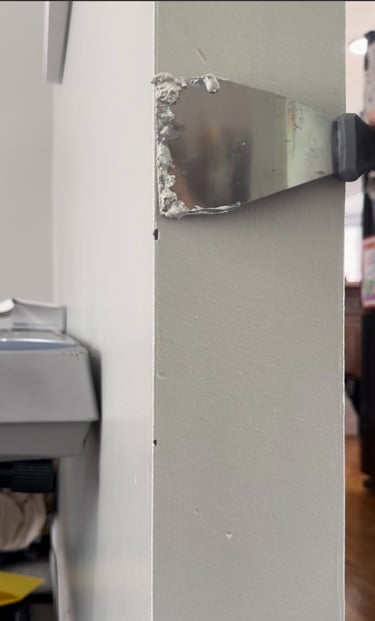
Step 2 — Apply the Putty
Open your drywall putty and load a small amount onto your putty knife — less than you think you need. For nail holes a pea-sized amount is plenty. For chips like the ones on my archway corners start with a small scoop and build up if needed.
Press the putty firmly into the hole or chip with your putty knife, working it into the damaged area to fill it completely. Then drag the knife flat across the surface in one smooth stroke to remove the excess and leave the putty as flush with the surrounding wall as possible.
This is the part that feels like playing with clay — and honestly that is exactly what it feels like. There is something genuinely satisfying about pressing that putty in and smoothing it out. Do not overthink it. The sanding takes care of any imperfection.
Step 3 — Wait for It to Dry Completely
This is the step everyone rushes and the step that matters most.
Drywall putty needs to dry completely before you sand it — and completely means completely.. Depending on the size of your repair and the humidity in your space this usually takes one to two hours minimum. Larger fills or deeper chips can take longer.
How do you know it is dry? The putty will change color — it goes from a darker wet tone to a lighter fully dry tone. It will also feel hard to the touch with zero give when you press on it lightly.
Do not rush this step. Sanding wet or partially dry putty pulls it out of the hole instead of smoothing it down. Wait the full time and the rest of the process takes two minutes.
Step 4 — Sand It Smooth
Once the putty is completely dry take your 120 grit sandpaper or sanding block and sand the repaired area in small circular motions. You are trying to get the putty perfectly flush with the surrounding wall surface — no bumps, no ridges, no edges you can feel with your fingertip.
Here is an important detail that makes all the difference when you paint: sand enough to blend the texture. Your wall has a texture to it — even walls that look smooth have a subtle surface texture from the original drywall finishing process. If you leave your sanded putty too smooth and glassy it will look different from the surrounding wall once you paint over it. Sand until the repaired area feels similar in texture to the wall around it.
Run your hand flat across the repair. If you can feel where the putty ends and the wall begins — sand more. When it all feels the same — you are done.
Step 5 — Check for Low Spots and Apply a Second Coat If Needed
Step back and look at your repair from an angle — side lighting or a raking light reveals any low spots or depressions that a straight-on view misses. If the repair looks slightly sunken or uneven apply a second thin coat of putty, let it dry completely again, and sand again.
Some repairs need one coat. Some need two. My archway corners needed two — because corners take more damage and the putty shrinks very slightly as it dries, which can leave a subtle depression on a first coat. Do not be discouraged if you need to go back — it is completely normal and the second coat is always faster and easier than the first.
Step 6 — Paint Over the Repair
Once you are happy with the smooth result it is time to paint. Use the same paint that is on your wall — if you have your original paint saved this is exactly what those leftover cans are for. Apply a small amount with a brush or a mini roller, feathering the edges out slightly beyond the repair so the new paint blends into the surrounding area rather than sitting as a distinct patch.
Let it dry and assess. You may need a second coat of paint depending on how your wall color covers. Most do fine in one coat if your wall paint is a good quality.
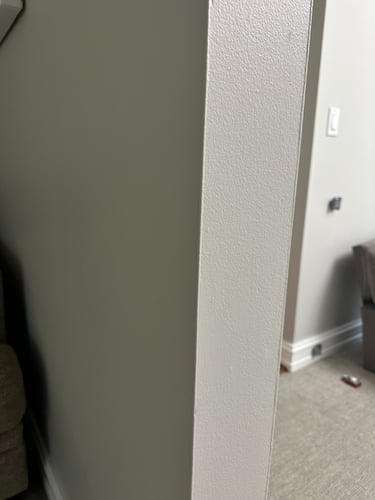
The Corners — A Special Note
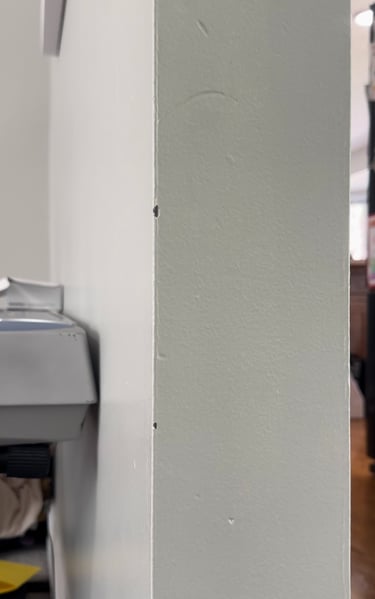
Corners are the hardest part of this whole process and the most common place to find chips — especially if you have kids or have moved furniture. The archway corners in my living room were the whole reason I finally tackled this project and they gave me the most trouble of everything I patched.
Here is why: corners have two surfaces meeting at an angle and the putty has to adhere to both simultaneously. It is also the highest-traffic area for impacts so the damage tends to be deeper and more irregular than a flat wall chip.
The solution is patience and multiple thin coats. Do not try to fill a deep corner chip in one application — the putty will shrink as it dries and leave a depression. Apply a thin first coat, let it dry completely, sand lightly, assess, and apply a second thin coat if needed. Two thin coats will always give you a better result than one thick one.
For outside corners specifically — the ones that stick out rather than fold in — press the putty in firmly and use your knife at a slight angle on each face of the corner to build up the edge cleanly. It takes a little practice but once you have done one corner the rest feel much easier.
The Thing That Surprised Me Most About DryWall Repair
I want to tell you something about this project that I was not expecting.
It was fun.
Not "satisfying in a functional way" fun — actually genuinely enjoyable. Pressing the putty in, smoothing it out, sanding it smooth — it feels like being a kid playing with clay. And then when you step back and see a smooth wall where a chip used to be — the payoff is completely disproportionate to the effort it took.
That feeling — the specific satisfaction of fixing something with your own hands — is genuinely one of my favorite things about DIY. And this project delivers it faster and easier than almost anything else I have done.
If you have been putting it off — stop putting it off. Just do it.
And if you are looking to tackle other easy DIY projects, check out my posts on Easy Home Improvement Projects for Beginners and 6 Easy Home DIY Projects Every Busy Mom Should Try.


STAY CONNECTED
GET IN TOUCH
Questions or ideas?
AngelaMarie@mommakeshome.com
© 2026. All rights reserved