Half Bath Makeover for $35: DIY Wall Stenciling for Beginners
How I transformed my half bath for $35 using an $8 wall stencil, a beginner-friendly DIY tutorial with real before & after photos, supply list, and honest tips from a mom of 3.
HOME DIY & DECOR
4/24/20267 min read
I Transformed My Half Bath for Just $35 – All It Took Was an $8 Stencil (and a Six-Year-Old Who's Smarter Than Me)
Meet the $35 half bath glow-up we didn't know we needed — and how a little DIY wall stenciling took our blah bathroom from totally forgettable to genuinely love-worthy.
To kick us off - my six-year-old caught a mistake mid project that I hadn't even noticed. We had our roller in hand, ready to go, and she looked at it, looked at the stencil, and calmly pointed out that the roller was too wide to fit. Then, before I'd even fully processed it, she suggested we use painter's tape and an old piece of poster board to extend it.
It worked perfectly.
That moment is now permanently attached to this bathroom, because so is her work. She helped mix the paint. She helped apply the stencil. She problem-solved on the fly in a way that honestly made me stop and think: this is why you let the kids help, even when it would be faster not to.
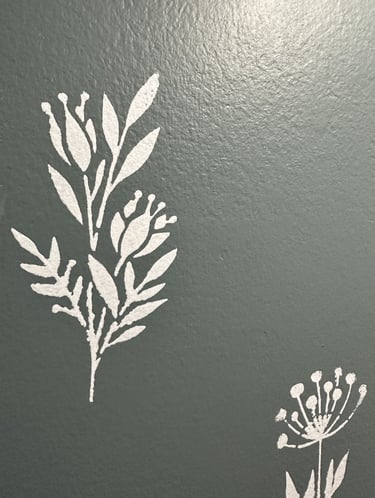
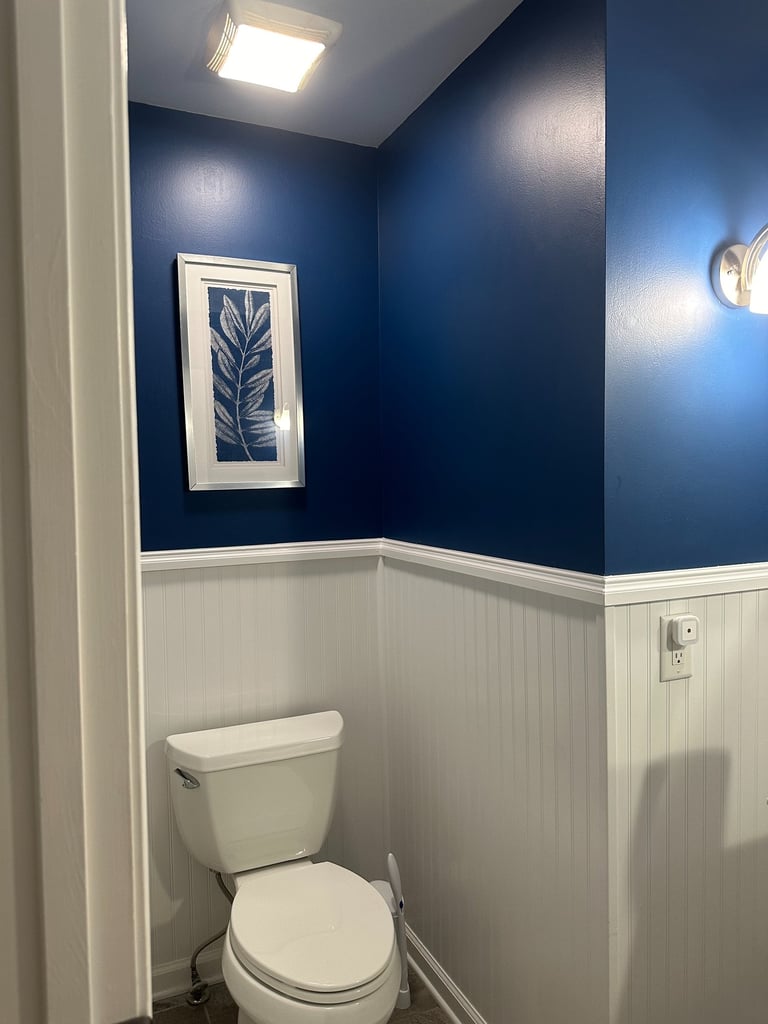
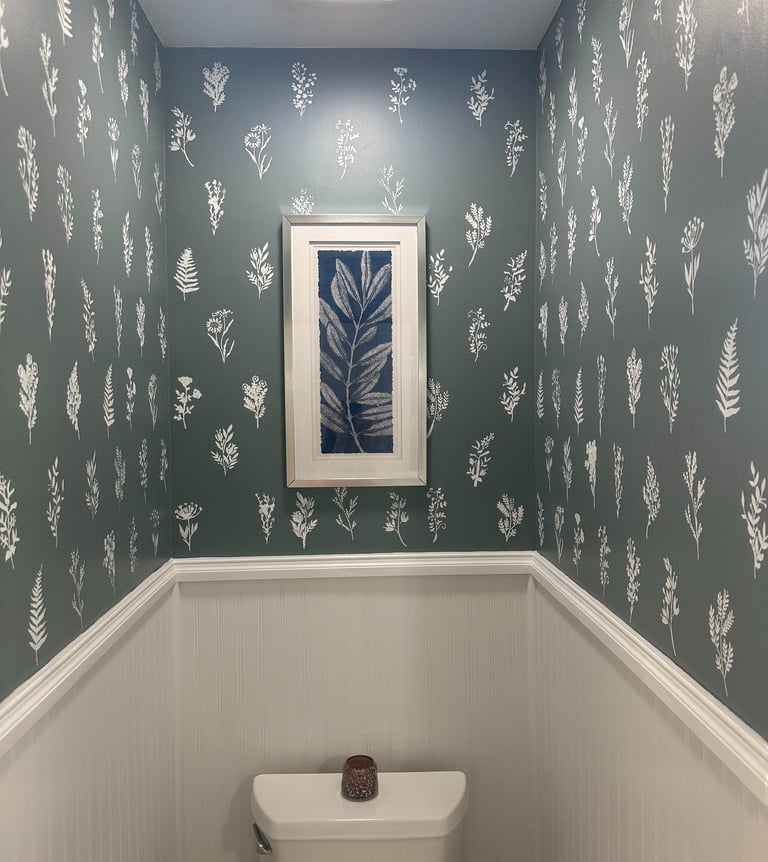
The whole project cost us $35. The walls went from flat, generic blue to a layered white floral stencil over a custom grey-blue base that I genuinely love walking past every day. But if you ask me what this project was actually about, it was about a Saturday afternoon, a few rounds of Guess Who while the paint dried, and a little girl who now knows she helped build this house.
Here's exactly how we did it.


Why I Tried Stamps First (And Why I Switched to Stencils)
First, let's talk about what wasn't working — and one detour I took.
The walls were a bright, solid blue. Nothing wrong with it exactly — it just felt unfinished, like we hadn't moved in yet. I wanted something with texture and personality, and I kept circling back to the idea of a pattern on the walls.
My first instinct was stamps. I actually bought a set and tried them out before anything else. And my honest answer? They didn't give me what I was looking for. The edges weren't as crisp, the design felt less polished, and the repeat pattern was harder to control. Stamps are great for some projects — this just wasn't one of them.
That little detour wasn't wasted though — it confirmed that stencils were the right call and that sometimes you have to try the wrong thing first to be sure about the right one.

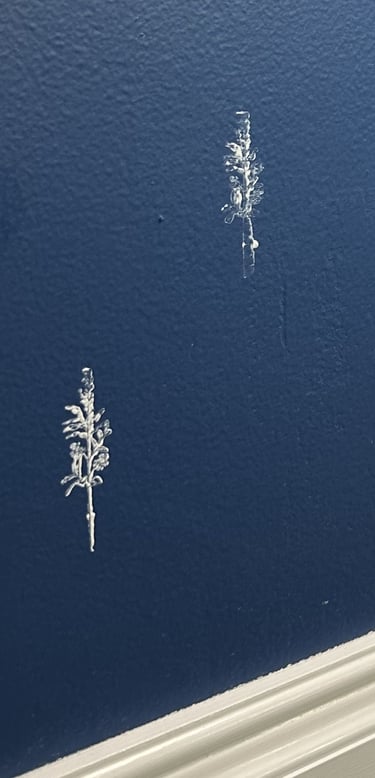
The Before
What we were working with - plain bright blue walls. Clean, but completely generic. No character, no warmth. Nothing that said anything about who we are or what we like. That's exactly what we were about to change.

How to Mix Your Own Paint Color for a Custom Base Coat
Here's where the budget part gets interesting. I already had two paint colors on hand — a light grey and a dark blue — so instead of buying a new base coat, I enlisted my 6-year-old daughter for help, and we mixed them together ourselves. The result was this moody, custom blue-grey with a tint of green that honestly looked more intentional than anything I would have picked off a swatch at the store.
Once we had our base color mixed and the first coat of paint on, it was time to let everything dry before we could put our second coat. That waiting period, by the way, is where the real fun started.
Pro Tip: Save a little extra of your mixed color incase you need to recreate it in the future.
Before you tackle your first coat, grab our free Painting Room Checklist. It walks you through every step, prep, priming, painting, cleanup, so you don't miss anything. Download it here and print it out to check off as you go.
Half Bath Stencil Supply List (Total Cost: $35)
One of the best parts of this project is how little we actually had to buy. Here's the full rundown — the "already owned" items are the ones that kept this well under $50.
Heads up — some links in this post are affiliate links, meaning I earn a small commission at no extra cost to you. I only share things I'd genuinely text a friend about.
If I did it again: The 18-pack of stencils at $7.99 is a fantastic deal — but for a full bathroom, I'd buy two sets. Between cleaning them, letting them dry, and the occasional one that gets a little bent out of shape, having backups means you're never stuck waiting. Totally worth the extra $8.
The Intermission
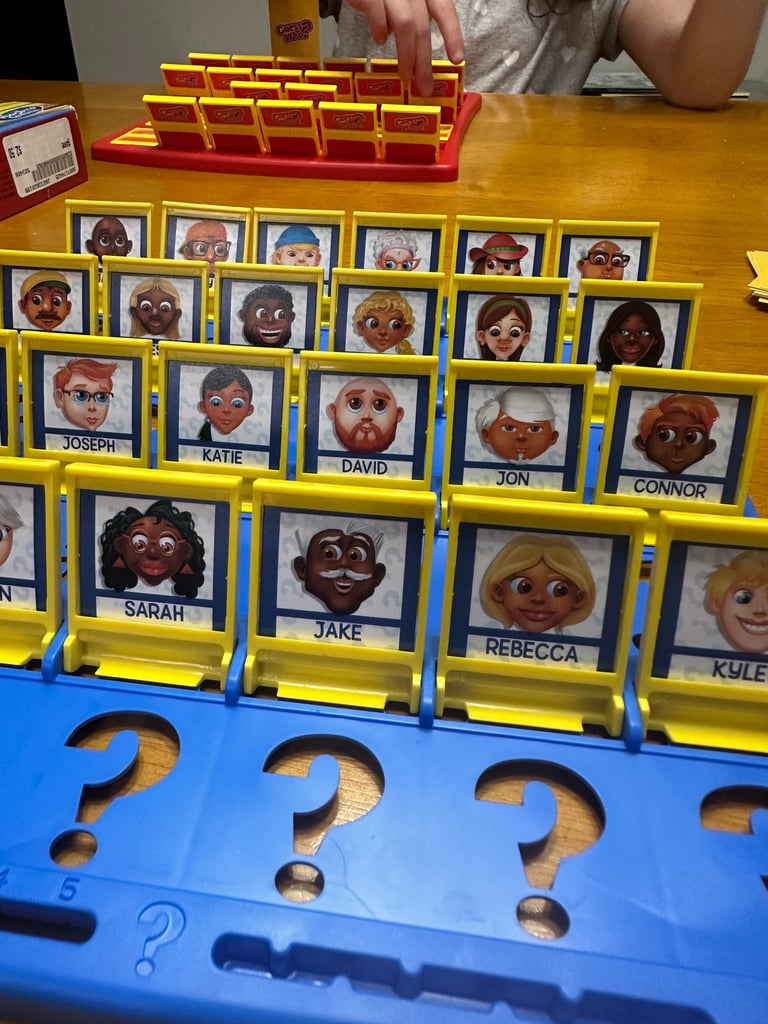
Paint has to dry. That's just the deal. My daughter had been right there with me through the whole base coat process, and when I said we had to wait, she didn't miss a beat. "Can we play Guess Who?" Yes. Obviously yes.
We set it up in the kitchen while we waited and played a few rounds. We both won some, we both lost some. It was one of those low-key moments that you don't realize in the moment that you'll keep thinking about later — I feel so lucky to be her momma.
How to Stencil a Bathroom Wall: Step-by-Step Tips
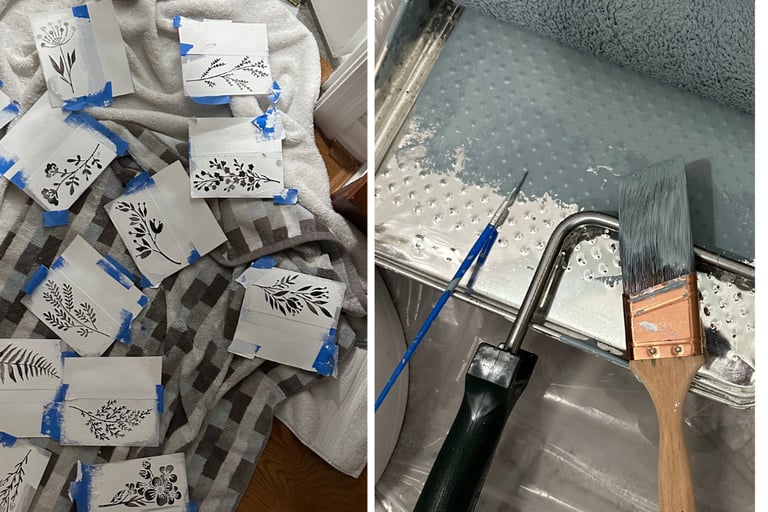
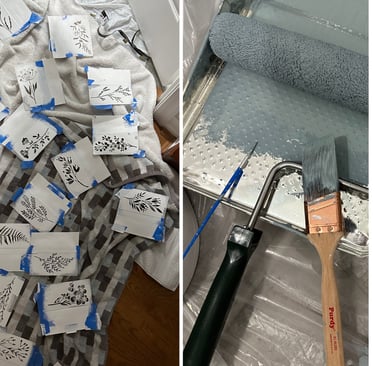
Here's what nobody tells you about stencils: they require a lot more patience than the packaging suggests. We used a floral botanical design in white over our custom grey-blue base, and the finished look is everything I hoped for. Getting there, though, had some real moments. Here is exactly how we did it.
Step 1 — Paint and dry your base coat first.
Make sure your base color is fully cured before you bring the stencil anywhere near the wall. Stenciling over a base that is not completely dry will lift or smear your color and ruin your crisp lines before you even start.
Step 2 — Position and secure the stencil.
Hold the stencil flush against the wall and tape it in place along the edges so it does not shift while you work. Even a small slip mid-print will blur the design.
Step 3 — Load your brush or roller correctly.
Dip your stencil brush or small roller in paint, then offload most of it onto a paper towel before touching the wall. You want it almost dry — too much paint is the number one cause of bleeding under the stencil edges.
Step 4 — Dab, don't drag.
Apply paint in light dabbing or stippling motions rather than brushing or rolling smoothly. Dragging pushes paint under the stencil edges and softens your detail.
Step 5 — Clean the stencil while the paint is still fresh — not dried.
This is the step that makes or breaks the whole project. Clean your stencil while the paint on it is still wet, every few prints. If you wait too long and let it dry, the fine detail starts to fill in and your next print will not be as sharp. Let the stencil dry fully before placing it back on the wall for the next repeat.
It is a rhythm you figure out as you go — paint, clean, dry, reposition, repeat — and it takes longer than the packaging suggests. Plan for that.
Step 6 — Touch up the edges as you go.
Even with a careful process you will get a few spots where the paint bled slightly or an edge did not come out fully clean. Keep a small detail brush on hand for this — my solution was one of my kid's tiny paintbrushes, and I am not even a little embarrassed about it. That small brush worked perfectly for getting into the fine detail of the floral design. Sometimes the right tool is whatever is already on hand.
Step 7 — Step back and check your spacing every few repeats.
Stand back from the wall periodically to check that your pattern is staying level and evenly spaced. It is much easier to catch and correct a drifting line every few feet than to notice it at the end of the wall.
Pro Tips Recap:
Clean the stencil with wet paint on it, not dried — dried paint fills in the detail and softens your next print
Let the stencil dry completely before repositioning it
Keep a small detail brush nearby for touch-ups — a kid's paintbrush works great
Less paint on your brush is almost always the right call
Half Bath Before and After: DIY Wall Stenciling Results
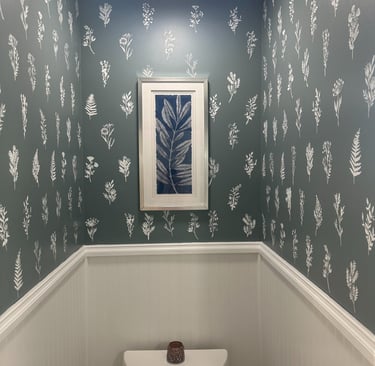
I genuinely love walking past this bathroom now. The white floral stencil over the custom grey-blue base is exactly what I pictured when I started — layered, personal, and finished. It doesn't look like a budget project. It looks like we meant it.
Is DIY Wall Stenciling Worth It? My Honest Review
It's just paint — but it's also more than that.
If you've been staring at a room in your house thinking "I should do something with that" — this is your sign. Stencils take more patience than I expected, but they are so worth it. Mix a paint color you already have. Use a kid's brush for touch-ups. Let your kid help wherever you can, even if it slows you down. Actually…especially if it slows you down.
My daughter didn't just help me with a home project. She problem-solved on the fly and she painted walls that are now permanently part of our house. She's going to grow up and walk past that bathroom and know she helped make it. That means more to me than I expected it to when we started.
Don't be afraid to try something new. Don't be afraid to include the kids. And definitely don't be afraid to lose a round or two of Guess Who while the paint dries.
Questions about stenciling, paint mixing, or which stamps not to buy? Reach out — happy to share what worked and what definitely didn't. And don't forget to grab our free Room Painting Checklist and follow along step by step. It'll save you time, mistakes, and headaches.
STAY CONNECTED
GET IN TOUCH
Questions or ideas?
AngelaMarie@mommakeshome.com
© 2026. All rights reserved