
How to Paint a Wood Shed With a Brush and Roller
Learn how I painted our old wood shed with a brush and roller for about $150, plus prep steps, supplies, and tips for tackling it with kids around.
HOME DIY & DECOR
10/28/20266 min read
Our shed went from rotted and sad to patriotic and proud—and I didn’t need a sprayer, a contractor, or a magically free week to make it happen.
Painting our old wood shed took about nine hours spread over three days, with three little kids in the mix. I used a brush and roller, spent close to $150 on paint and supplies, and finally gave our repaired shed the makeover it deserved.
If you read my post on how we repaired our rotted shed, this is the fun part. The repairs were done. Now it was time to make the outside look like something we had fixed on purpose.
Here’s what I used, how I painted it, and what I’d do differently.
Our Wood Shed Painting Project at a Glance
Shed size: 12 ft by 12 ft
Method: Brush and roller
Time: About nine hours over three days
Cost: Close to $150 for paint and supplies
Colors: Sky blue siding, white trim, and a red door
This was the painting portion of our shed makeover. The repairs were a separate project, which I covered in my rotted shed repair tutorial.
Supplies I Used to Paint Our Wood Shed
This post contains affiliate links. If you purchase through my links, I may earn a commission at no extra cost to you.
Two gallons of Valspar Duramax Exterior Paint + Primer, about $56 per gallon
White paint for the trim
Red paint for the door
MOLD ARMOR Professional Brand Mold Kill & Control Spray for the areas I was concerned about
Multi sized Angled brushes
9 inch roller with 3/4 inch nap
A small kid’s paintbrush for tight corners
The white paint, red paint, and some of the brushes were already in my stash, so those weren’t new purchases for this project.
Why I Painted Our Shed Without a Sprayer
I considered using a paint sprayer, but I had never used one. And honestly, this did not feel like the project where I needed to add “learn another tool” to the list.
I wanted to keep the cost down and work with a method I already understood. A brush and roller felt manageable, especially since I knew I’d be doing the work in chunks.
Was it the fastest possible method? I can’t compare it to spraying. But it worked for this shed, and I’m glad I kept it simple.
How I Painted Our Old Wood Shed
1. Repair the Rotted Wood First
Painting was the last part of this makeover—not the fix for the damage underneath.
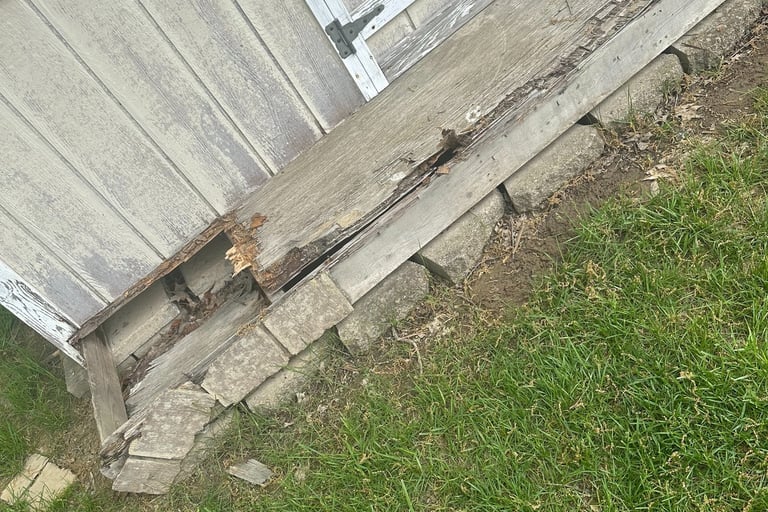
We repaired the rotted areas before I started painting. If your shed needs that kind of work, start with how we repaired our rotted shed so you can see what we tackled before opening the paint.
It’s not the colorful part, but it’s the part that made this makeover possible.
2. Clean the Shed and Let It Dry
I sprayed down the shed with a hose to remove as much dirt and grime as I could. Then I treated the areas I was concerned about with MOLD ARMOR Professional Brand Mold Kill & Control Spray.
After cleaning, I let everything dry completely before painting.
3. Paint the Trim
I started with the white trim.
Our trim isn’t flat, so I found it easier to paint those awkward areas first without trying to keep every edge perfect. I knew I’d come back for touch-ups once the blue was finished.
This was not a “one careful pass and done” situation. But it worked for me.
4. Brush the Edges and Siding Grooves
Next, I used a brush around the edges and in the grooves between the siding panels.
That let me get into the areas the roller wasn’t going to reach neatly.
Once those spots were painted, I could move on to the larger, flatter sections.
5. Roll the Blue Paint Onto the Panels
This was the satisfying part.
After all the smaller brushwork, rolling the sky blue onto the panels felt fast. The shed finally started looking like the makeover I’d had in my head instead of a repair project waiting for its next step.
6. Touch Up the Trim
Once the blue was finished, I went back over the white trim to clean up the edges.
There were definitely touch-ups. I expected that, but this part still deserves a spot in the project timeline. The big panels may go quickly; the little edges have other plans.
Did One Coat Cover Our Shed?
I was surprised by how well the blue covered in one coat. A little suspicious, honestly—but happy with how it looked.
That’s what happened on our shed, with this color and the surface we were painting. It isn’t a promise that one coat will be enough for every project.
Valspar currently recommends two coats for Duramax, so follow the directions on your exact paint product rather than using my coverage result as the rule.
What I’d Do Differently With the Trim
The white trim needed more touch-ups after I finished the blue panels.
I’d still paint the trim first on this shed because of its shape. For me, painting those uneven areas and cleaning up the edges afterward felt easier than trying to keep everything perfect from the beginning.
What I’d change is my expectation of how long the finishing details would take.
The roller part went quickly. Making all the edges look finished was its own little project.
My Favorite Painting Trick: A Kid’s Paintbrush
One of the most useful tools came from my kids’ supplies.
There were tight corners where the trim met the panels, and one of their small paintbrushes made those spots much easier to reach neatly than my regular brush.
Nothing fancy. Just a small brush we already owned, finally contributing to a project that wasn’t on construction paper.
Our Red, White, and Blue Shed Makeover
I wanted a little USA vibe, so I went with sky blue siding, white trim, and a red door.
The combination feels cheerful and a little retro. After dealing with the rotted wood and repairs, it was nice to make a decision based entirely on “I think this will look cute.”
How Long It Took to Paint the Shed With Kids Around
The project took roughly nine hours spread over three days.
I did most of the painting on Sunday while my husband watched the baby and football—a win for him, too.
The older kids came outside with me, and my seven-year-old actually helped paint.
It wasn’t nine uninterrupted hours. It was a project I could pick up, put down, and come back to around the rest of our life.
That’s usually the version of DIY happening over here.
How Much It Cost to Paint Our Shed
I spent close to $150 on paint and supplies for this part of the makeover.
The two gallons of blue paint were about $112 total. I already had the white paint, red paint, and some brushes, which helped keep the cost down.
That total does not include the earlier shed repairs.
If you’re starting without any paint or supplies on hand, your cost will be different. This is what I spent—not a promise that every shed can be painted for the same amount.
Was Painting Our Old Shed Worth It?
For me, absolutely.
After putting the work into repairing it, seeing the shed finished in blue, white, and red made the whole project feel complete. It looks cared for again instead of like something we were trying not to look at.
I’m hoping the repairs and fresh paint help us get more life out of it. For now, I’m just happy with how much better it looks—and that I managed to get it done without buying a sprayer or waiting for an empty calendar.
If your shed needs more than paint, start with how we repaired our rotted shed to see the less colorful part of this makeover.


STAY CONNECTED
GET IN TOUCH
Questions or ideas?
AngelaMarie@mommakeshome.com
© 2026. All rights reserved